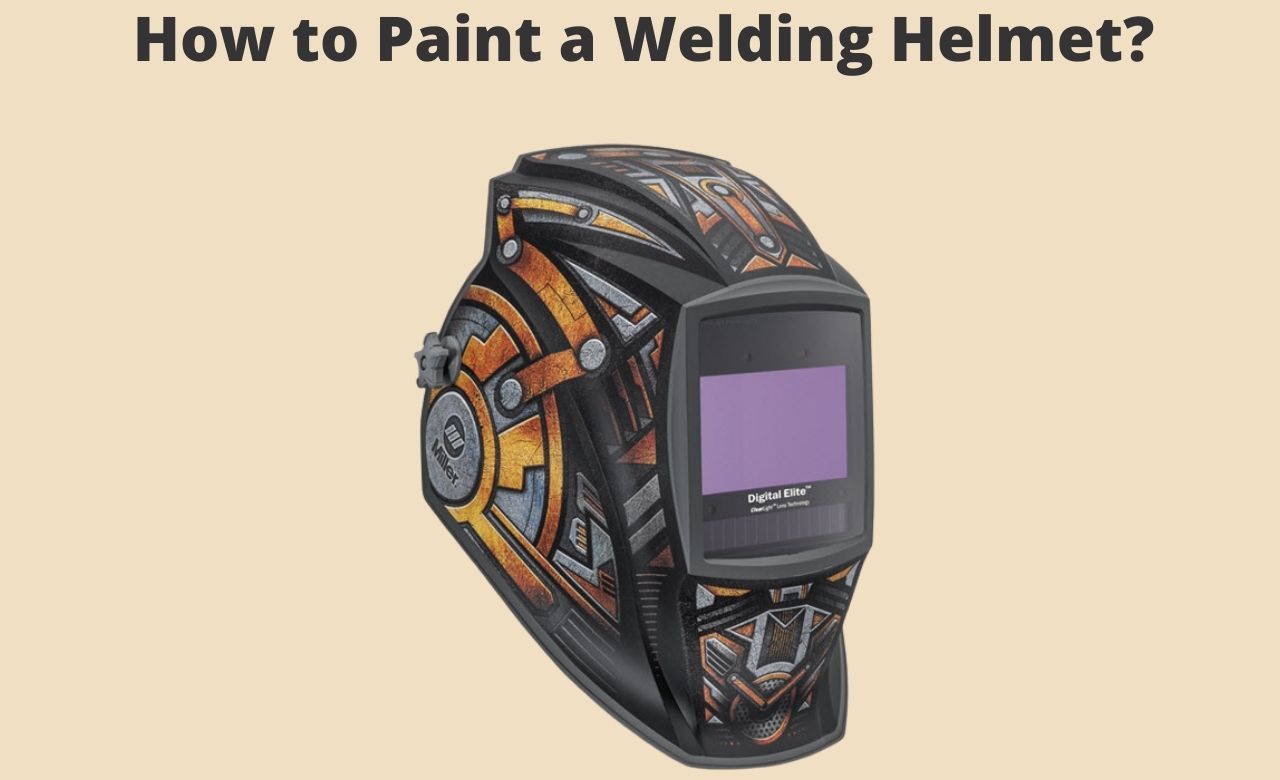
There are numerous reasons why people opt to paint their welding helmets. Some do it simply because they love the design, characters, or images of the painting.
Others have painted their helmets because they sought to cover the helmet’s original color. Since everyone has their reasons for painting their helmets.
A lot of people also buy these helmets for collecting purposes. You can create something that you haven’t seen from other welding helmets by painting a welding helmet. It could also be an interesting and practical gift for the welders in your life.
The painting of welding helmets is one of the easiest DIY projects in the world. When you paint your helmet, it may seem like a great idea to throw your helmet into a bucket of paint.
However, by doing this, you could inadvertently overcoat your helmet, making your job and time-consuming.
This article will give you a step-by-step guide on how to paint your welding helmet so that you can easily do it yourself and have a great-looking welder’s hat.
All the Things You Will Ever Need To Paint Your Welding Helmet
- Welding Helmet
- Cleaning stuff
- Paint Brush
- Primer
- Desired Paint
- Cover with newspaper
How to Paint Your Welding Helmet: The Mad Scientist Method
Part of the fun of getting a new welding helmet is decorating it to fit you, your lifestyle, and your personality.
At Rusty’s Welding Supply, we have put together an easy-to-follow 8 step guide to painting your welding helmet in a fun, unique way.
Follow these steps, choosing your own colors or paint job, and you’re on your way to having the coolest welding helmet on the block.
Take off the Lens and Headgear
It is absolutely necessary to remove your lens and headgear before painting your welding helmet, or else you run the risk of experiencing severe discomfort while you are welding.
Harsh primer and paint will leak into your lens and headgear, leaving it covered in the dark paint that won’t brush or wipe off.
The problem is not limited to inexperienced painters either these leaks can happen to even the most experienced of welders.
With how short a time lenses last when painted improperly, it’s never worth taking the risk of having a bad experience.
Removing the lens and headgear from a welding helmet before you prime and paint it will help you avoid the biggest risk of damaging your expensive, high-quality welding helmet – getting paint inside it.
The hardest part of removing your lens and headgear is actually removing them. Eighty percent of the time, the lens and headgear will just pop out when you are trying to remove them.
They sometimes need only a little encouragement when they don’t pop out easily. Don’t worry – there isn’t anything that can break or crack from needing a little help to get them off.
Removing the lens and headgear from your helmet is easy, but you may want to check with the user manual in the event you have questions.
Without knowing how to correctly remove these pieces of gear, you may cause damage to your helmet.
Before you begin painting, we want to remind you of a few simple safety rules for painting with an airbrush.
First, you need to remove the lens and headgear from the gun and set them off to the side.
This is important, so please make sure that you do this once these two items have been removed, set them far away from any potential paints or primers that you may be used in your project.
Cleaning the Helmet
A dirty welding helmet will not only make your project look awful, but it is also going to affect the way you work.
Trying to paint a dirty welding helmet is a surefire way to make blotchy spots on your finished product. To get a smooth finish, make sure your helmet is clean and roughened before you start.
Is your helmet starting to look a little old and dirty? While it’s certainly not necessary, you can more easily give yours a customized look by cleaning and roughening it up.
First, use a damp rag or cloth to wipe away any dirt that may be on the exterior of your helmet.
If you’re having a difficult time removing all of the dirt, consider using an abrasive material such as a Scotch Brite wheel, soft-bristled brush, or even sandpaper to get the job done.
Then, gently roughen the surface of your helmet with sandpaper or another abrasive material. This will allow potential paint that you add later to more easily stick to the helmet’s exterior.
Clean and roughen up your helmet with these products. Use the abrasive surface cleaner to buff out any scuffs and smudges.
The abrasive might even loosen some of the dirt that’s built upon the surface. This will allow the primer and paint to stick to the helmet better, resulting in a smoother finish.
Don’t forget to roughen up those edges area with a little rubbing compound, which will make painting them last a little longer.
Also See: Do Welding Helmets Charge in the Sun?
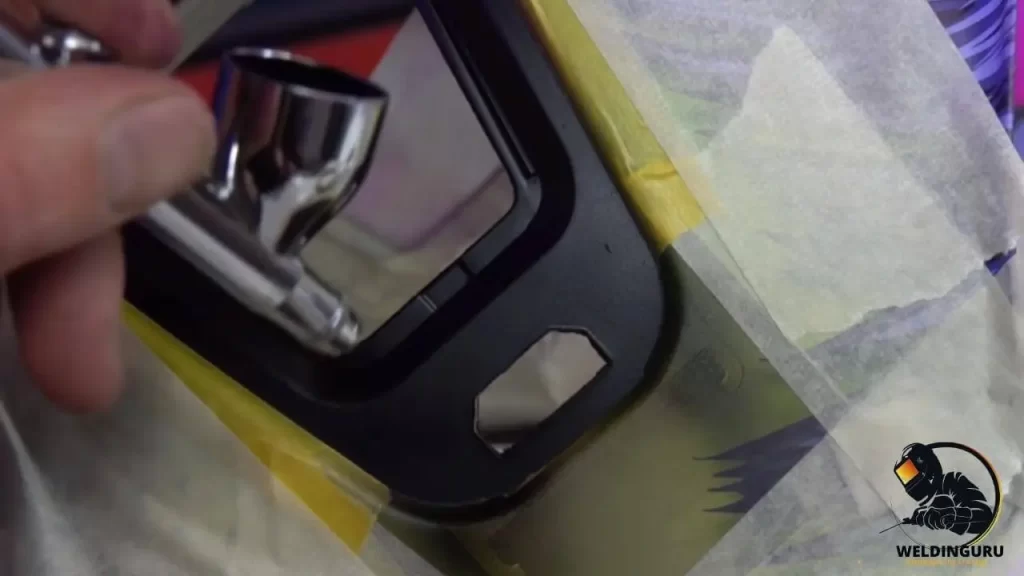
Tape to the Inner Part of the Helmet
Painting your helmet is a great way to give it a new look without having to buy a whole new helmet.
But, an awful paint job on the inside of your welding helmet can not only ruin the appearance but also jeopardize your safety.
To ensure that your helmet paint job remains professional, tape to the inside of the helmet before painting it.
The trick to taping newspaper to the inside of your helmet is about maintaining a professional appearance.
Put the tape just in between the exterior and interior paint job, say one or two centimeters from the front of the mask on either side. The tape should go from the top of the helmet to the bottom or vice versa.
The newspaper being used for this project should be a newspaper that has been rolled up. Then, it should be taped to the ceiling of the welding helmet and squished down, so it stays in place.
To ensure that the paint of your welding helmet will last, cover the inside with newspaper. By doing so, you lessen the chance of any paint encountering the interior of your helmet.
Tape the edges with a low-tack painter’s tape. Doing this will help you get a thorough painting job on your helmet.
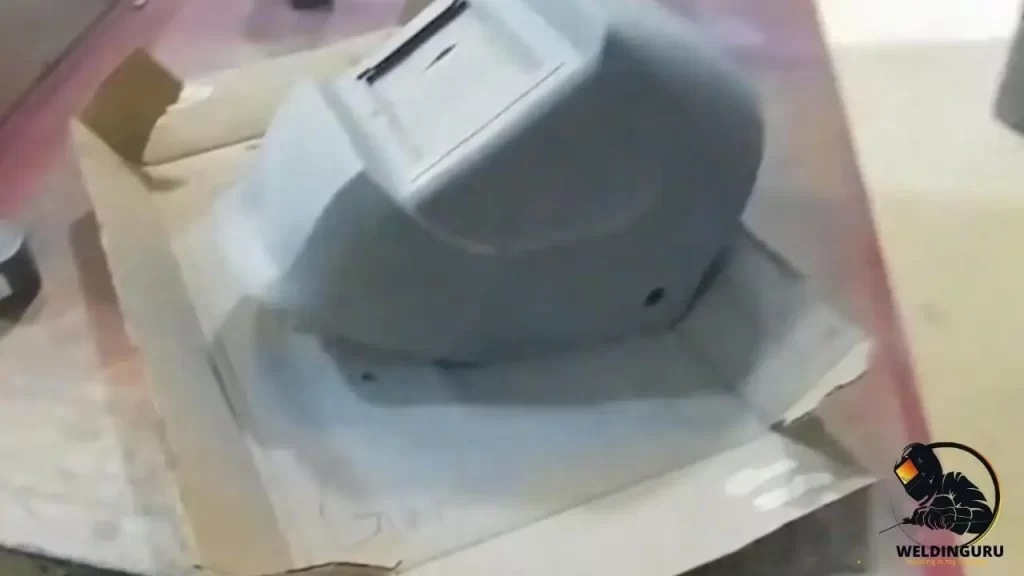
Application of Primer
Painting a welding helmet is an arduous task, but it’s also an important one. Paint primer gives your helmet a nice finish and helps it to reflect heat quicker.
It should be apparent that applying paint primer is a critical element in the painting process. This primer blends in easily and offers top-quality protection for your helmet.
Use this primer before you paint your next helmet or another item or before you give it as a gift.
Ready to give your helmet a makeover? Use our primer before you paint to ensure there’s better adhesion.
This will mean that your metallic paint job will stay that way, and you won’t have to do 15 coats for your helmet to be just as cool as you want it to be. And the primer will apply easily over any surface. It really is the gear up for success.
When painting your helmet, there is a step that many people miss, which actually makes the most difference in the look of your paint.
To achieve beautiful final results is to apply primer to your surface. Primer enhances the durability of the paint and keeps it from chipping or scratching easily.
Not to mention that primer will affect how well your paints cover and how long the surface will last between touch-ups.
A primer is like a first coat that you apply to your helmet. The helmet provides protection from airborne contaminants, chemicals, and welding sparks.
Your helmet doesn’t repel these elements – it only stops their entry into your respiratory tract. However, this is only possible if your welding helmet is free of dents and cracks.
This is where a Primer comes in. There are multiple types of primers on the market – many with different characteristics that produce a different protective layer.
Whether you’re a beginner or a professional welder, using a primer on your helmet is critical to the painting process.
The right primer will help prevent paint from dripping, peeling, and blistering and create a smoother surface.
Many of our paints are made specifically for welding helmets, which are infused with alcohol and water-resistant ingredients.
These special paints can withstand temperatures as high as 400 degrees Fahrenheit—the melting point of steel.
It’s time to spray that helmet of yours. Good primer coats start off better, look better, and are much easier to paint over.
To start, shake your can of primer vigorously for 8 to 10 seconds. To ensure even coverage, work in small sections and don’t be too generous with the primer. Allow the primer to dry completely before you proceed to paint.
Apply Filler Paint to Your Welding Helmet
Application of filler paint is a necessary step that sometimes gets overlooked. However, it can make the difference between an acceptable finish and a truly beautiful one. Here are some reasons to consider adding this useful step to your painting plans.
Every welding helmet will likely develop some imperfections in the shape of nicks and darks. Minor imperfections and nicks can be filled in using a layer of filler paint.
Apply a few layers of filler paint over any minor imperfection that you find on your welding helmet.
Remember, you will never be able to paint over dents or cracks, but that is okay as long as the crack does not go into the lens. If a crack does go into the lens, you will need to replace your welding helmet.
While cover painters will always attempt to make their work as clean as possible, you can rest assured that even the greatest painters will make a few imperfections.
Perhaps it’s a small stroke of the brush or an overcorrection of one area followed by an under-correction in another.
No matter what these small imperfections are, they can leave your paint job looking rather blotchy and unprofessional.
One excellent solution is to apply a few layers of filler paint to cover them up, leaving you with a much smoother, glossier finish.
The final thing that you need to know about filler spray paint is that it is rust-resistant. This is a really important thing to know about this kind of spray paint because it can help make sure that your helmet stays strong and nice.
You will love how well it works for your helmet at home or any other place that you might want to use it. Filler paint is a great way to give your welding helmet an easy, professional-looking paint job.
If there are any small imperfections that you would like to remove from your helmet, then this is the paint for you. It will go on easily as if you were painting normal overcoat paint only far thinner.
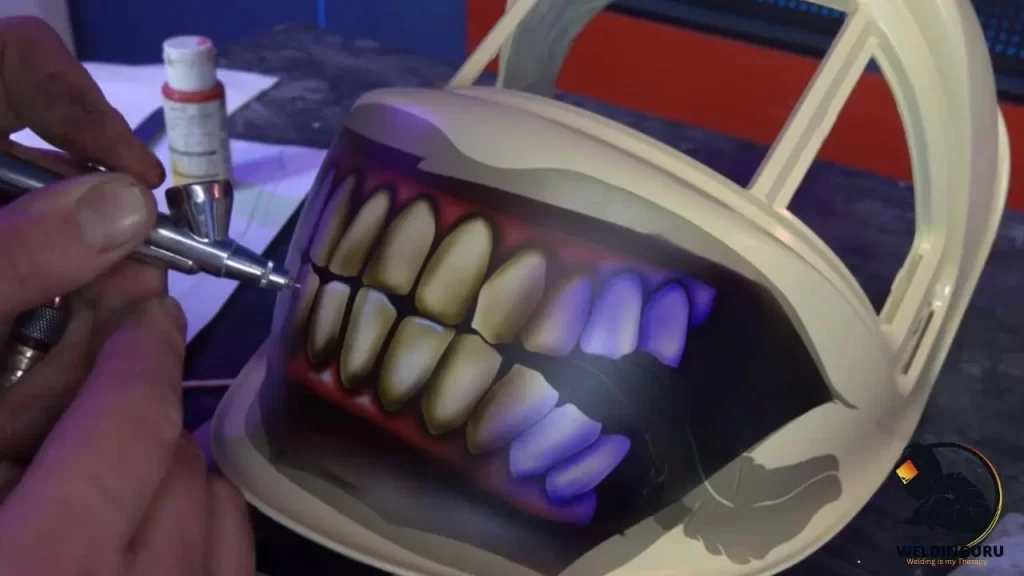
Paint with your Desired Color
The final step of painting your welding helmet is to apply your desired color. This one-step spray paint is easy to apply and dries quickly, so you’ll be ready to hit the job site in no time.
If you hate the look of brush and bottle paint jobs on your welding helmet, we recommend choosing spray paint.
Spray painting a helmet is far easier than brush and bottle painting, but with the advantage of completely covering your helmet with a tough, durable finish.
This allows you to focus on other projects and maintain your welding helmet in the same condition for longer.
Be sure to spray paint your welding helmet with multiple coats for more vibrant and lasting color.
Spray painting with multiple coats is more effective than painting with a single coat because the layers of paint will absorb into the surface, making the color brighter and less likely to fade in the future.
Multiple coats from the painting will give your helmet a new look and feel while ensuring that it stays looking great! This can be accomplished using any brand of spray paint in the color or shade of your choice.
Your welding helmet is an important piece of clothing. You may choose to add your own personal touches such as stripes, lightning bolts, or any other design. Once the paint has dried, apply the duct tape in the desired pattern.
The traditional method of using spray paint is to apply duct tape and then spray paint over the tape.
The end product can be fun and creative, but it leaves an outline of the tape on your helmet. By applying a base coat of spray paint first, you can then add multiple coats of duct tape to the surface.
It’s Time to Dry
When you’re painting your welding helmet, allowing it to dry properly is key. Using this “Let It Dry” 12 x 12 inches microfiber towel will make sure that your helmet is completely free of any unwanted smudges or streaks.
The terry looped side makes a gentle rub over the surface of the helmet, ensuring that every inch has been given adequate time to dry thoroughly.
Coming in at a nifty 12 x 12 inches, this towel can be folded easily and tucked away in your paint box until you need it again.
It is no surprise that you wish to have the best helmet, when the best welding helmet is the one that fits your needs. Aside from this, though, let your welding helmet dry completely before using it again.
Don’t be surprised when some manufacturers recommend letting your welding helmet air-dry overnight; they only want you to use their products as intended.
Once you’ve allowed the welder’s helmet to completely dry out, make sure that you re-attach the lens and headgear correctly. Then, when moving on to a test run, make sure the process is happening efficiently.
Things to Remember before Painting a Welding Helmet
If OSHA would let you paint your welding helmet, surely the slag wouldn’t hamper visibility, right?
All joking aside, painting a welding helmet is something that has been done for decades. OSHA allows us to apply a heat resistance finish over our helmets which protects them from heat retention and increases their longevity. Plus, it protects the actual equipment as well.
- You can paint a welding helmet. But a fireproof finish is the smart way to go. This can be hard to find in paint stores, or you may have to order them online. Fire-resistant paints and primers should be used on every welded item that is intended to protect the wearer from high heat. A welding helmet must meet certain fire codes in order to qualify as being fire-resistant.
- Whenever you paint the outer face of a welding helmet, ask yourself if the helmet is safe to use in its current condition. Don’t paint a helmet with major cracks or dents– any helmet that has sustained such damage cannot be relied upon to protect you from arc flash.
- It’s a known fact that painting your welding helmet can add a cool and personalized look to your protective gear. Yet, many welders don’t know that painting their helmets is actually quite common. When you paint your helmet, it will not affect the integrity of the main part of the helmet (the part you wear on your head). Plenty of helmets have been painted by various companies, professional welders, and more. The paint should not affect the welding helmet.
- Most welding helmets can be painted, but you’ll need to check with the manufacturer first. If the helmet has been through previous chemical or mechanical processes, such as cleaning, painting should be avoided as this can damage the helmet’s protective properties.
- Some welding helmets are much easier to paint than others. The first thing you want to do before painting a welding helmet is to test the paint. You should always start off with an inconspicuous spot on the helmet, such as the top or backside of the helmet. This will prevent any mishaps and make sure that you can effectively demonstrate that the welding helmet is just as effective with a paint job.
Also See: The truth about solar powered auto-darkening helmets
Safety Precaution while Painting a Welding Helmet
It’s a good idea to prepare for safe painting. If you’re using a sprayer, be sure that the paint is thoroughly mixed. Test the spray pattern at various distances from your surface.
If you’re painting at home, take precautions when working around electrical outlets. Remember to turn off your outlet before cutting the power. If you’re not sure which is which, ask an electrician for advice.
Use safe paint products and test them out on scrap wood to make sure they won’t damage your furniture or other surfaces.
Don’t assume that paint is safe just because it’s new; if a can has been around for years, it might be lead-based paint, which is highly toxic and should not be used.
Test each new product for lead before using it on your helmet. Place a small amount of the product on a clean white towel.
Next, moisten the area of your helmet to be painted with water and dab some of the wet product on it with a clean brush or cloth.
The red lead pigment in some paints can leave a mark that looks like blood; this test will tell you if your helmet is painted with a lead-based product.
Treat painting your welding helmet as a potential fire hazard. Make sure you read all instructions on the paint can before beginning and do not smoke or allow open flames near the painted helmet.
Many paints are flammable or contain chemicals that could be harmful if they get in contact with skin or clothing. Wear gloves when working with paint and discard them when you’ve finished.
You should also make sure that you’re painting in a well-ventilated area, so fumes don’t accumulate.
uppose you start feeling dizzy or faint while painting, stop what you’re doing immediately, and move to a well-ventilated area. If symptoms persist after moving away from the area, go to a doctor immediately.
So that, If you’re going to paint your welding helmet, you should be prepared for the job by taking some precautions.
The helmet is intended to protect your eyes from the harmful effects of light and sparks, but if any paint or other contaminants gets into your eyes, it could potentially cause serious injury.
Also See: Best Auto Darkening Welding Helmet
Final Verdict
Painting a welding helmet is an exciting way to make your helmet your own. Whether the helmet is just for fun, or part of a costume, painting is a simple way to customize your gear and add some flair.
In these simple steps, you can transform your helmet into a bright and eye-catching piece of welding equipment for whatever adventure you might have planned. Paint is a fun way to spruce up your room and add personality.
However, when painting, you must follow all the steps in order to get a professional and safe paint job.
This will require you to use fire-resistant paints and materials, especially if you will be painting in an unventilated space.
Be sure to take your time when applying paint and let it dry for a long period of time before treating the surface with anything that can stain it.
Related Posts:
- How to Weld Cast Iron with a MIG Welder?
- How to Weld Titanium?
- How to Properly Set an Auto-Darkening Welding Helmet?
- Can I Use a Welding Helmet to View an Eclipse?