Are you new to stick welding? Have you just bought a welder and are now looking at the leads that come with it? Does this all look a little confusing?
Don’t worry; stick welding can seem daunting at first, but as soon as you get the hang of it, you’ll wonder why you didn’t try it sooner!
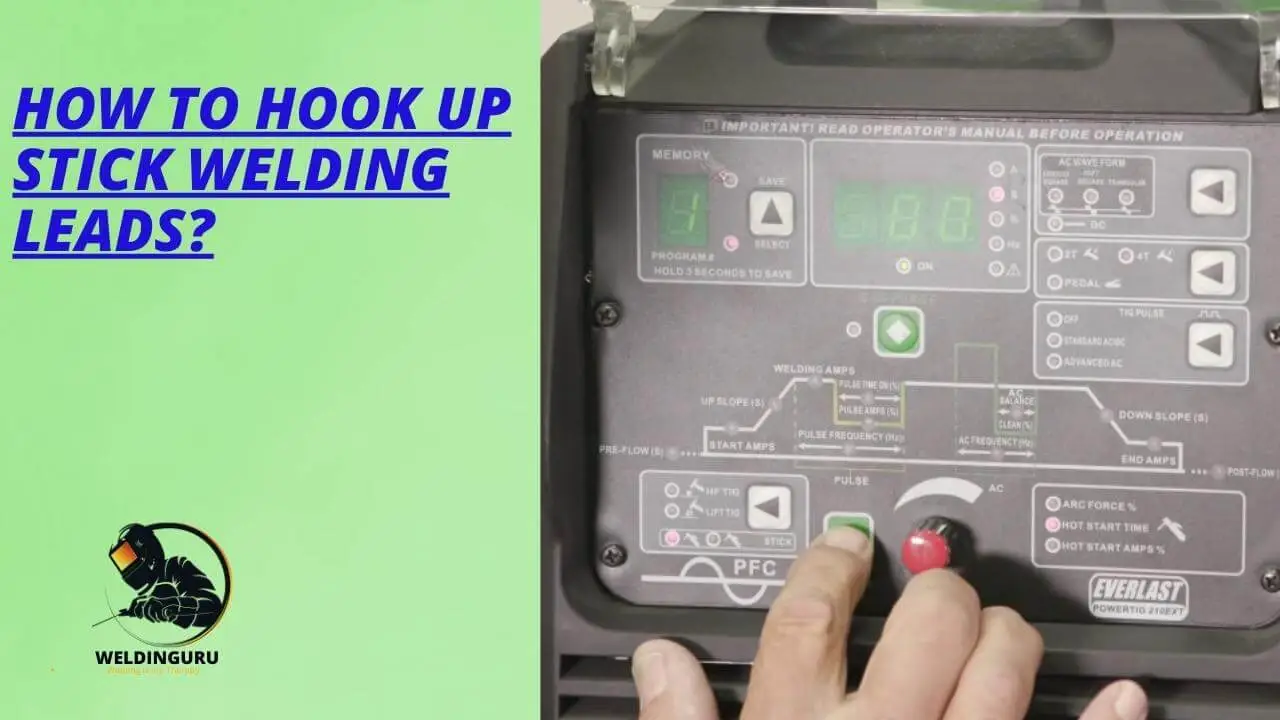
I am going to walk you through how to hook up stick welding leads. Stick welding leads are becoming as popular as MIG and TIG welding leads, so it’s good to know how to hook them up yourself.
For the purposes of this discussion, I will assume you have an understanding of what stick welding is and how it works, including basic stick welding vocabulary as well. Just in case you don’t, read on.
How to Hook up Stick Welding Leads?
Hooking up stick welding leads is a crucial part of the welding process. The first step is to attach your ground clamp to the work area and then connect it to the negative terminal on your welder. Next, attach one end of your lead extension to the positive terminal on your welder and then connect it to the torch tip. Finally, attach the other end of your lead extension to your gun trigger.
Now that you are set up with all of your equipment, you can begin welding!
Stick welding is one of the most popular methods of joining metal parts. It’s a good choice for those who want to use an arc welder because it doesn’t require as much training or skill as other types of welding. It’s also easy to learn what to do if you’ve never tried it before.
Meaning of Welding Leads
Welding leads are electrical wires that connect the welding power source to the workpiece. The leads are made of a variety of materials, including copper and aluminum, and come in different sizes and shapes.
They are color-coded to identify their function. Welding leads have a live side and a ground side, which must be connected appropriately for proper operation.
The lead is a flexible wire and cable that connects the welder to the electrode holder. The electrode holder holds an electrode, which is what melts through metal when it’s touched by electricity.
Types of Stick Welding Leads
Ground lead and electrode lead are two types of stick welding leads. Each type has its own unique set of features and benefits.
The ground lead is a multi-stranded wire that is attached to the ground clamp on your welder. It helps to provide more flexibility for your welding project.
Ground leads can range in gauge from 10 gauge to 12 gauge, with the most common being 12 gauge. The larger the gauge number, the thinner and lighter the wire will be.
Electrode leads are also multi-stranded wires, but they are much smaller in diameter than ground leads. They attach directly to your welding gun, which means they’re not directly connected to a power source like ground lead wires are.
How to Set & Run Stick Welding Machine?
A stick welding machine is a device used to create strong, permanent welds by fusing two pieces of metal together. I will show you how to set up and use a stick welding machine in the form of steps:
Step 1: Proper Protection
The first step is that you should always wear protective goggles while working with a stick welder so that no harmful particles can enter your eyes.
Step 2: Prepare the Machine
Before you can use your stick welding machine, you must prepare it. First, plug in the power cord and turn on the power switch. Next, remove any protective coverings from the front of the machine.
Then, attach a ground clamp to one of the rods on your machine before turning on its power supply. Finally, attach a bottle of shielding gas before connecting your air hose to the back of your machine.
Step 3: Choose the Right Electrode
The most important thing is to select the right size electrode wire. If you use a thin electrode wire, it will be hard to penetrate through the metal plate or sheet, but if you use a thick electrode wire, then it will be hard to control it while working on an arc. So you should select an appropriate thickness according to your needs and requirements.
Step 4: Attach Rods
Next, attach your rods to the front of your machine with clamps according to their size and length before adjusting them so they are level with each other.
If necessary, add more clamps as needed until all three rods are level with each other when viewed from above or below them (or both!).
Step 5: Amperage Setting
Set your amperage setting at 30 amps per inch of stick electrode length (6 amps per mm). This will ensure that you don’t overheat your welds while also ensuring that they penetrate deep enough into the material so that they’ll be strong enough when cooled down later on!
3 Important Welding Setup Types
In welding, the setup refers to the machine variables that are used to control the welding process. Setup types are determined by the type of arc being used and the properties of the base metal. There are three important types of setups:
1. DCEP (+):
Direct Current Electrode Positive, which is similar to DCEN but with a positive charge instead of a negative. This setup works well if you’re working with thin metals and want a more delicate weld. It’s also good for people who don’t have access to a lot of power when they’re welding.
This is also known as reverse polarity. For most stick welding applications, I recommend the DCEP polarity for better results.
2. DCEN (-):
Direct Current Electrode Negative, which is the most popular of the three setups. It uses direct current, and the electrode is negatively charged. This is a great option for beginners or for someone who wants to get a quick weld without having to adjust their settings.
This is also known as straight polarity. In this, the workpiece is positive, and the electrode holder is negative.
3. Alternating Current (AC):
Alternating Current, which uses an alternating current instead of a direct current. This setup gives you more control over your welding because it allows you to adjust the voltage as well as the amperage level (which controls how much heat is used). The downside is that this setup requires more time and patience than DCEN or DCEP.
In this welding setup, a 60-hertz alternating current is usually used for stable welding results.
When Stick Welding is the Ground Positive or Negative?
When stick welding, it’s important to know whether the ground will be positive or negative. The ground can be either positive or negative, depending on what type of metal you’re welding.
When welding steel with a positive ground, you’ll have to use a negative polarity electrode to complete the circuit. If the metal is an alloy that has more than one type of metal in it (like stainless steel), then you’ll need to use a ground that is also positive.
If your metal is an aluminum alloy with no carbon content, then you’ll need a negative grounding rod set up in order to complete the circuit.
DCEP or DCEN: Which Polarity is Suitable for Stick Welding?
For stick welding, DCEP is the most common polarity. DCEP stands for direct current electrode positive. DCEN stands for direct current electrode negative.
The positive and negative polarities are determined by which electrode is connected to the positive terminal on the power source and which electrode is connected to the negative terminal on the power source.
DCEP is used in most stick welders because it has a high resistance to arc jumping. Arc jumping occurs when an arc jumps from one electrode to another because of a difference in current flow between them (in this case, from positive to negative).
High resistance to arc jumping means there will be a less likely chance of an arc jumping from one electrode to another, and thus more consistent welds being made without interruption or interruption at all.
If you want to stick weld thick sheets, then I personally recommend DCEP polarity. On the other hand, if you want to weld thin sheets, then I suggest DCEN polarity.
Things to Consider Before Selecting Welding Lead Size
Welding lead size is a vital part of the welding process, as it determines the amount of current that will pass through the joint.
The size of the lead used in a given application depends on several factors, including the amperage draw and the length of time it takes to weld.
The following are some things to consider when selecting welding lead size:
- The type of material being welded, as some materials require larger welding leads than others.
- The thickness of the material being welded as also has an impact on what size lead is required for optimal results.
- The type of welding machine being used and its maximum amperage rating; will determine what size leads are compatible with your equipment.
- You should also consider the amount of time that will be required for your project before making any decisions about what type of wire size is best suited for the job at hand.
How to Know About Different Welding Lead Sizes?
Welding leads are available in a variety of sizes and shapes, with each size having its own specific use. If you’re new to the world of welding, it can be difficult to know what size lead you to need for your project.
In this table, I will show you the different sizes of welding leads of aluminum & copper:
Copper Welding Lead Sizes
| Cable Length | Amperes | |||||
| Ft | M | 100 | 150 | 200 | 250 | 300 |
| Lead Sizes | ||||||
| 50 | 16 | 2 | 2 | 2 | 2 | 1 |
| 75 | 24 | 2 | 2 | 1 | 1/0 | 2/0 |
| 100 | 31 | 2 | 1 | 1/0 | 2/0 | 3/0 |
| 125 | 39 | 2 | 1/0 | 2/0 | 3/0 | 4/0 |
| 150 | 47 | 1 | 2/0 | 3/0 | 4/0 | 5/0 |
Aluminum Welding Lead Sizes
| Cable Length | Amperes | |||||
| Ft | M | 100 | 150 | 200 | 250 | 300 |
| Lead Sizes | ||||||
| 50 | 16 | 2 | 2 | 1/0 | 2/0 | 2/0 |
| 75 | 24 | 2 | 1/0 | 2/0 | 3/0 | 4/0 |
| 100 | 31 | 1/0 | 2/0 | 4/0 | 5/0 | 6/0 |
| 125 | 39 | 2/0 | 3/0 | 4/0 | 5/0 | 6/0 |
| 150 | 47 | 2 | 2/0 | 3/0 | 4/0 | 5/0 |
This is the guide to different lead sizes with respect to cable length and amperage in the form of a table, so now you have the idea about lead size for your upcoming welding leads project.
Different Between AC & DC Welding
There are two main types of welding: AC and DC. Each has its own pros and cons, and they’re commonly used in different situations.
AC welding uses high voltage to create an electric arc that melts the workpieces together. The result is a smooth weld with little penetration. The strength of this type of weld is also dependent on the thickness of the materials being joined.
DC welding is more versatile than AC because it can be used with a variety of different metals and materials at different voltages. It uses direct current to create a continuous arc between the electrodes, allowing them to penetrate deep into the material being joined.
This means that DC welds are stronger than AC ones and can be used for joining thicker materials.
Precautionary Tips When Hook Up Stick Welding Leads
To ensure the safety of the welders, there are some precautionary tips that they must follow while hooking up stick welding leads.
- The first step is to ensure that you have all your tools and accessories before you start working. This includes a pair of gloves, safety glasses, a face shield, and ear protection.
- The second step is to clean the area where you will be working before you start. You can use a vacuum cleaner to remove any dirt from the surface or wipe it down with a damp cloth.
- The third step is to do a visual inspection of the area where you will be working for any debris or other hazards that could cause an accident during welding. If there are none found, then proceed further.
- The fourth step is to inspect the ground clamp for any cracks or breaks in its structure that might cause short-circuiting during operation due to the failure of insulation between two wires connected to it (one from the gun and the other from a torch).
- Also, check whether there are any loose connections inside the ground clamp that could lead to short-circuiting as well if not properly tightened with screws/bolts provided by the manufacturer/supplier during the assembly process.
How can you Change Polarity?
The polarity of a stick welder is the direction in which current flows through the welding wire. The direction of the current determines how much heat is generated and how much weld penetration occurs.
The process of changing polarity involves reversing the two wires on the welding gun by switching them from one terminal to another.
The first step in changing the polarity on a stick welder is to disconnect the power source from your machine. This may be done by flipping a circuit breaker or by unplugging it from an electrical outlet. Once this is done, you can proceed with changing the polarity on your machine.
Problems Linked with AC Polarity on a Stick Welder
There are several problems that can occur when you’re using AC polarity on a stick welder.
One of the most common problems is overheating. This happens when you’re welding with AC polarity because it takes longer to weld, and you don’t get as much heat from the arc.
Another problem is that your welds won’t be as strong. This can happen because the amperage isn’t high enough to melt the metal properly.
The third problem with AC polarity is that you might not be able to see what you’re doing as easily, making it hard for you to control where your arc goes and how long it stays there.
Final Words!
The best way to get a handle on how to hook up stick welding leads is to simply try it. Hook up the machine and welding lead yourself and see how it’s done.
The process of hooking up stick welding leads is fairly straightforward and consists of a few simple steps. Proper safety precautions should always be taken during the setup process, along with continual monitoring during actual stick welding.
You’ll soon learn how easy it is to get a handle on stick welding leads, and it will be something you master in no time. Best of luck!
Faqs:
Which lead is positive on a stick welder?
Stick welding uses the anode part of the welding circuit to attract electrons, which produces the arc and causes fusion. The part of a stick welder that attracts electrons is called the anode (positive), while the part that produces electrons is called the cathode (negative).
Do you stick weld on positive or negative?
By stick welding on positive and negative, you can achieve better results. Stick welding on positive gives you more flexibility, while stick welding on negative is quicker but not necessarily easy.
What is the correct polarity for stick welding?
The correct polarity for stick welding is DC+ or straight polarity, which means the electrode will strike the workpiece as it would in reverse polarity. Although some advantages can be gained from using other polarities, such as DCEN or alternating current (AC), straight polarity is the most common type used for stick welding with certain electrode types.


 Regulation (392.7—392.9)!")


")